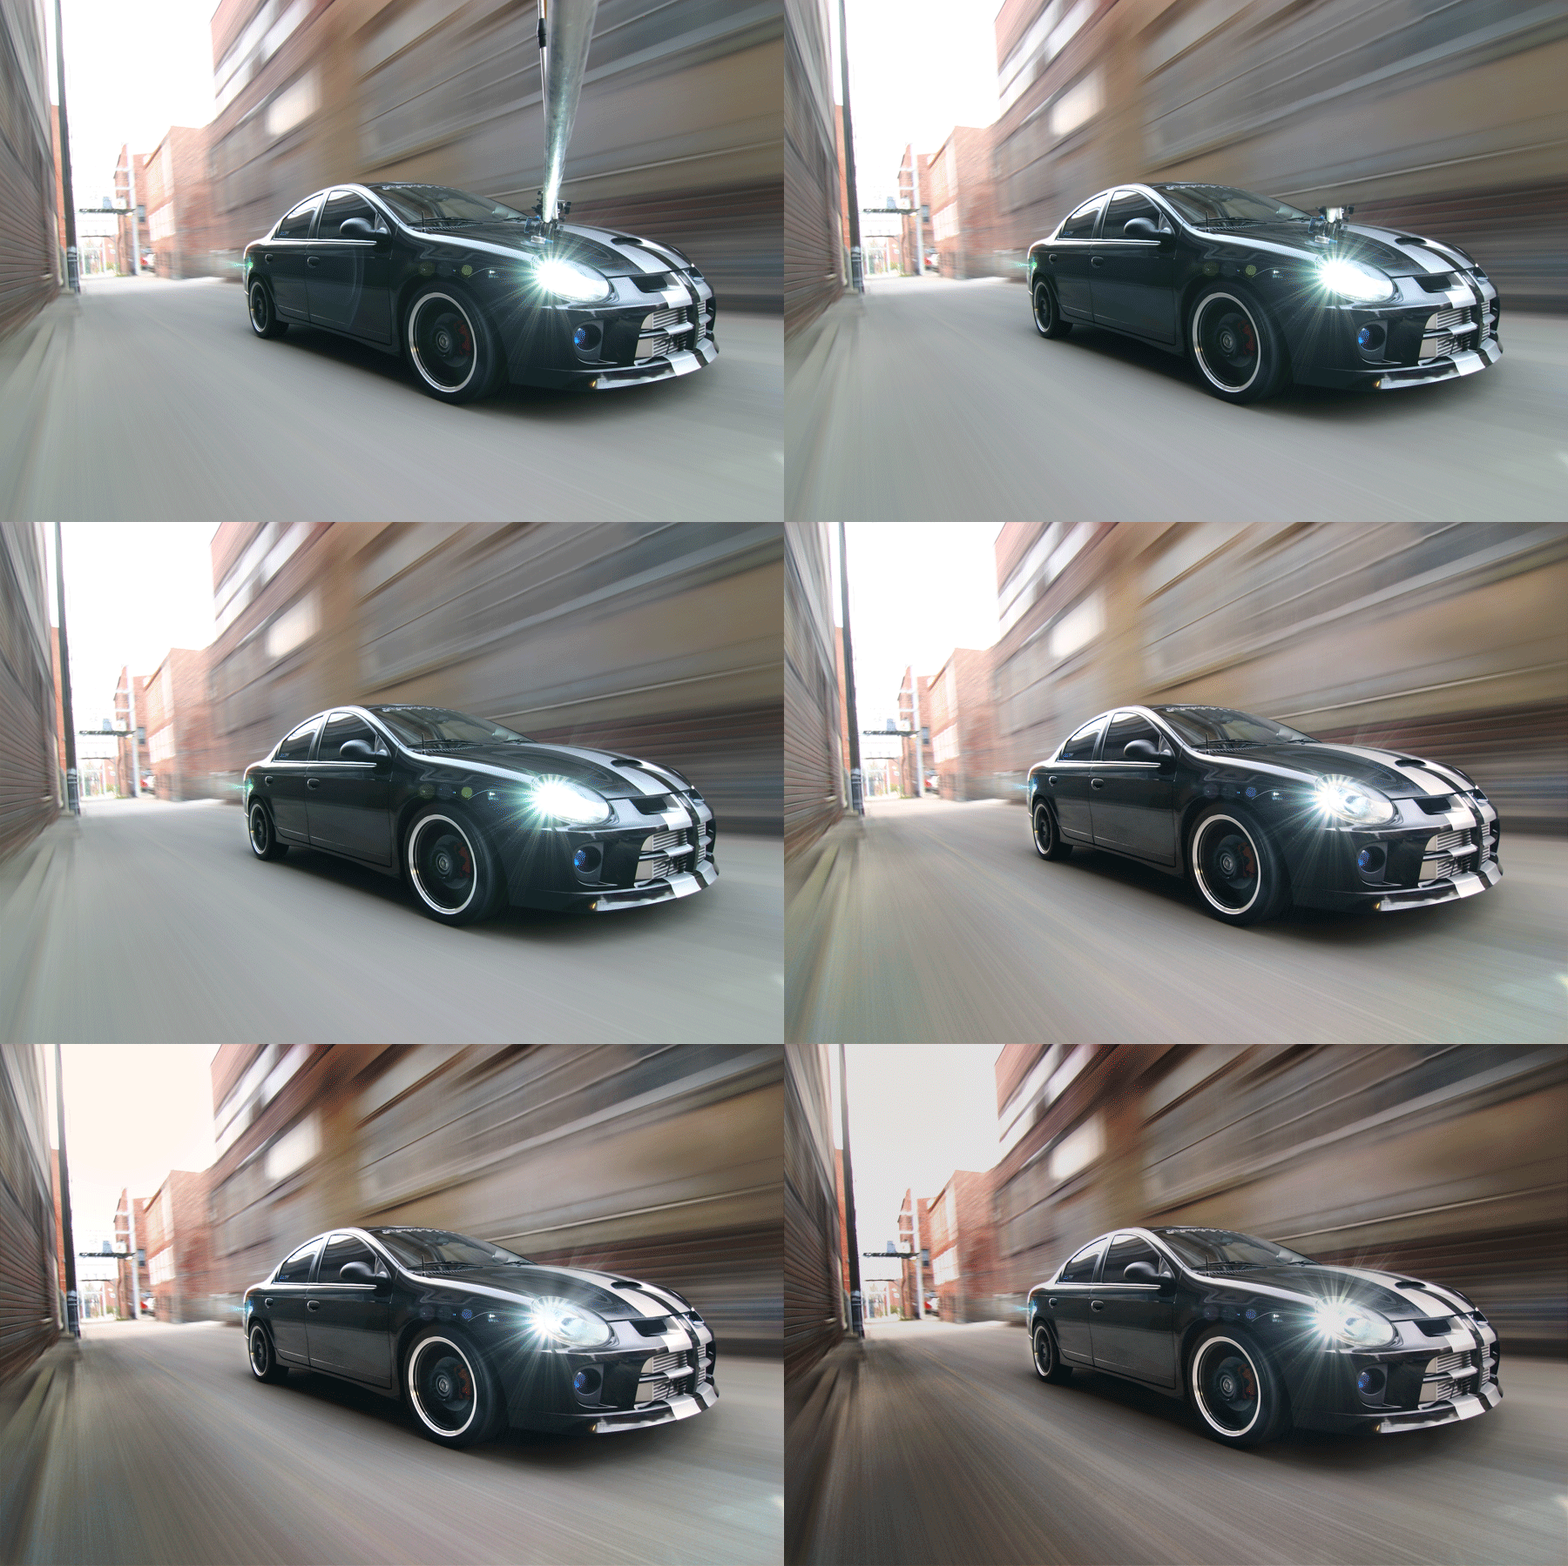
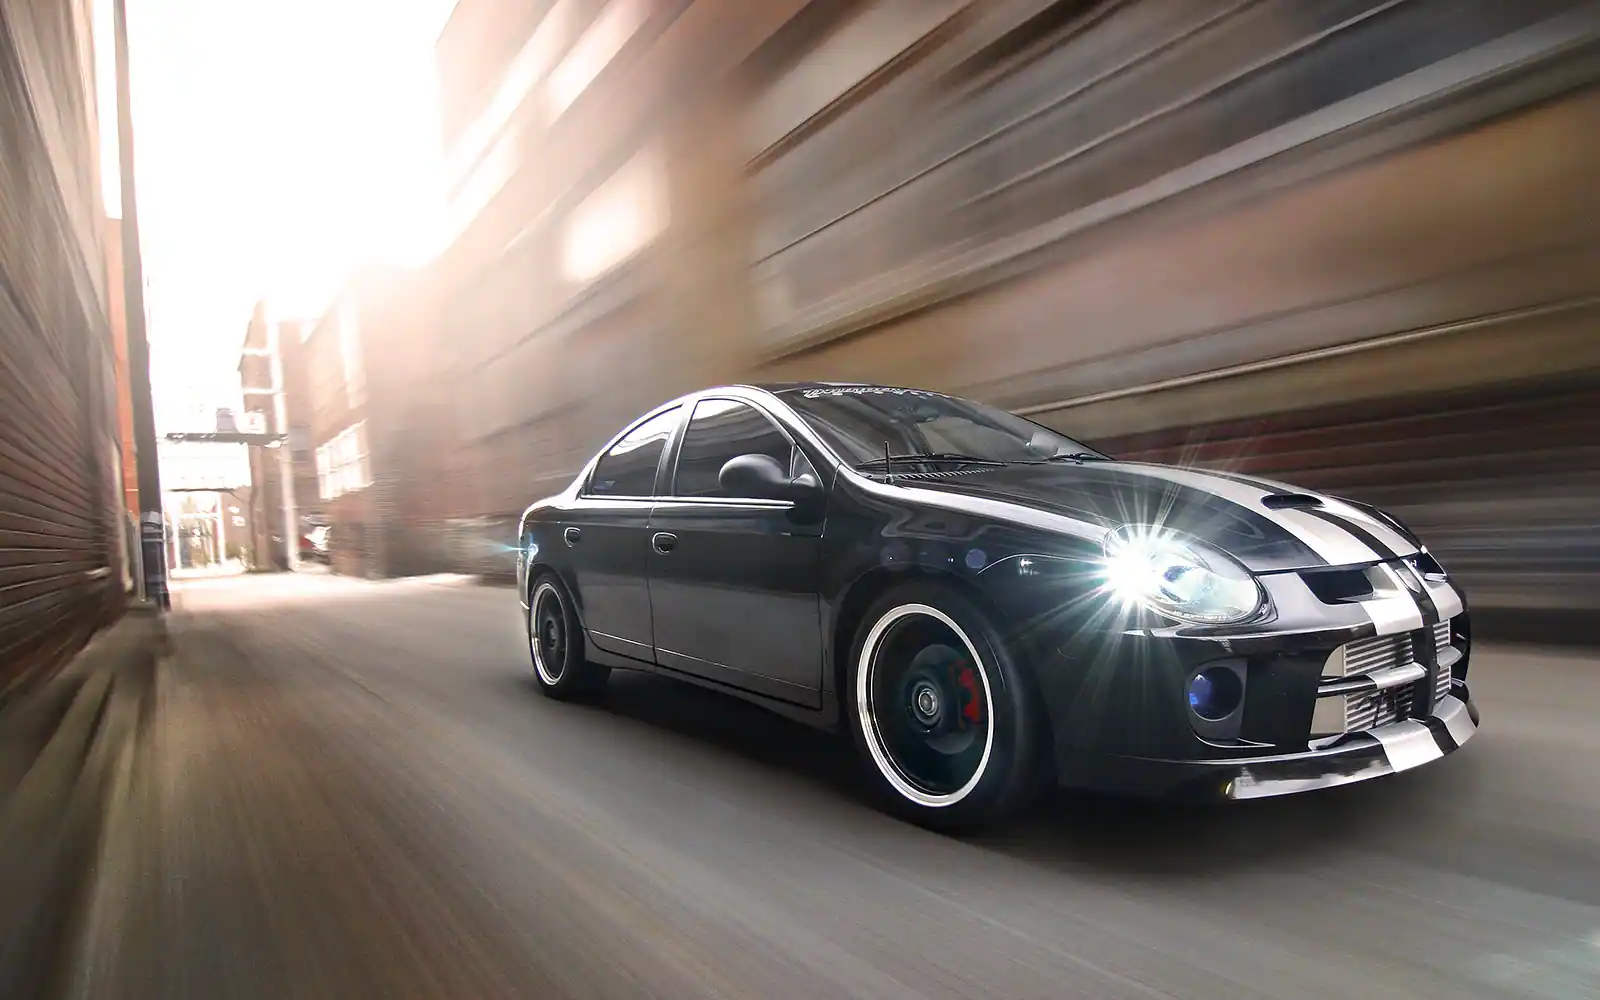
There was once a time where the inner workings of an automotive rig were veiled in mystery. Nowadays, there are a myriad of resources for those wishing to build a custom automotive rig. For those who aren’t the DIY’er type, there are even prefabricated rig packages such as those sold at automotiverigs.com. All to often, however, those who jump into the automotive rig game may do so without the prerequisite skills required to remove the rig in post processing. The longest, most rigid rig in the world means nothing, if one can’t maneuver their way around Photoshop. To seamlessly edit a rig out, it takes a certain familiarity with the clone tool, healing brush, pen tool, paintbrush, and blur tool.
To help with this endeavor, I’ve assemebled a list of tips and tricks that I use to remove rigs from my images.
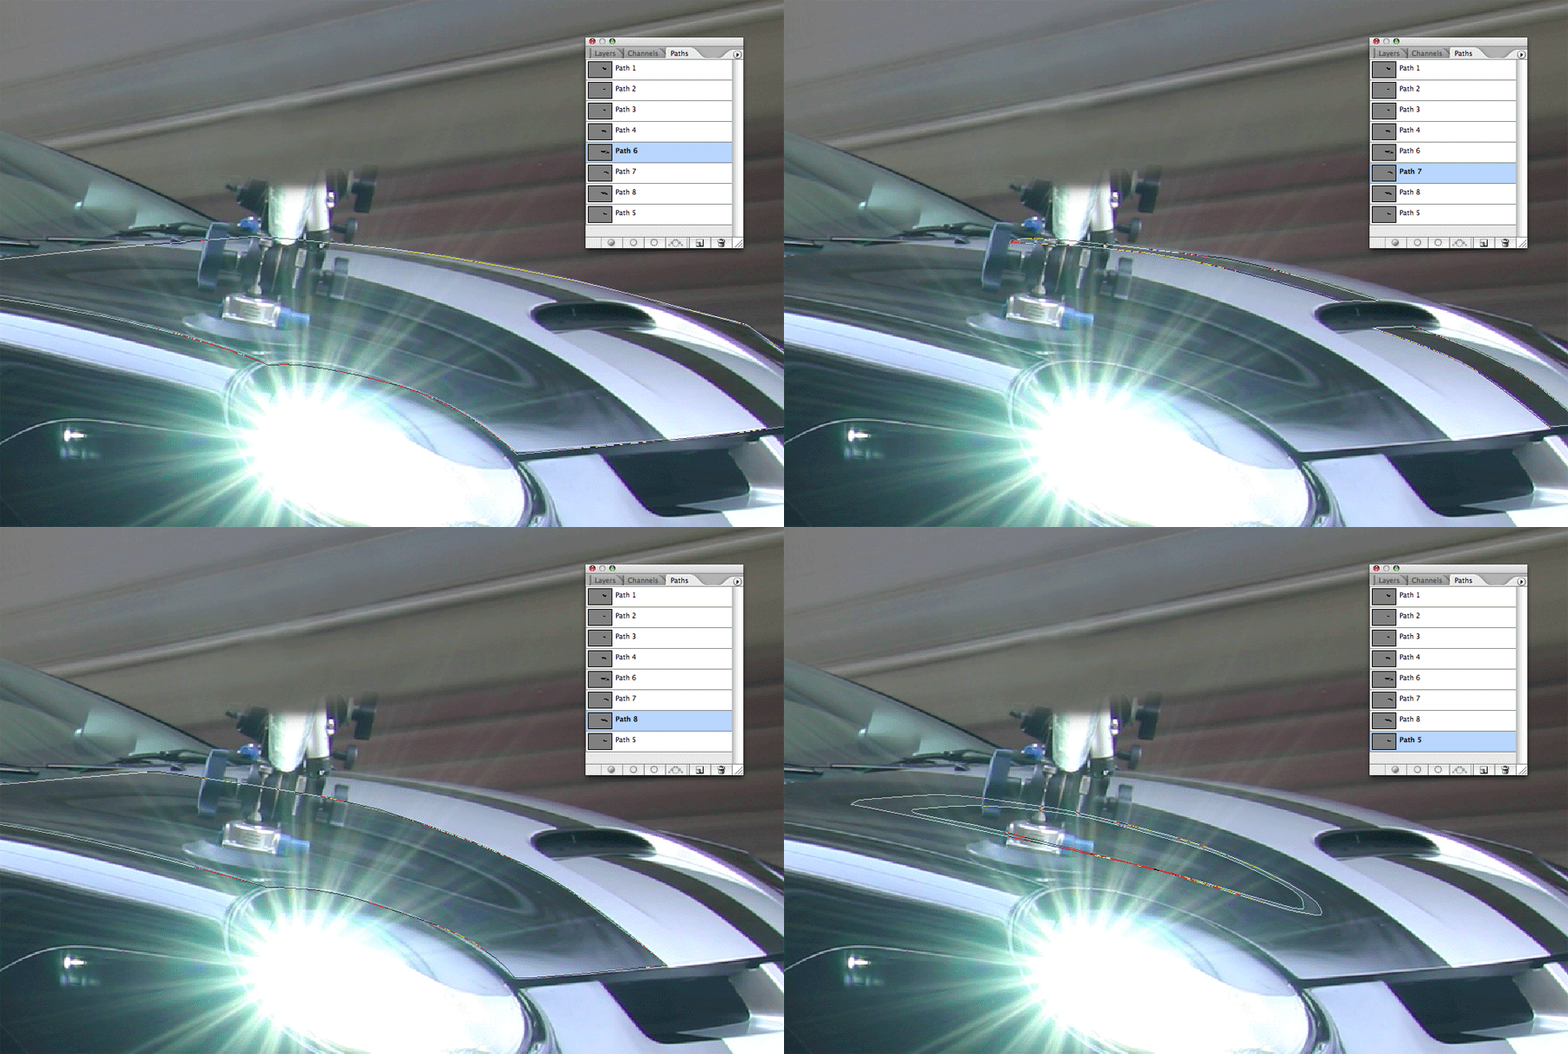
#1 Use the pen tool initially and often. — The first thing I do when I open an image is outline the boundaries of significant areas as new paths. It may seem rudimentary, but it will most definitely speed up your workflow later in the process. Take notice of changes in color and gradation and use the natural boundaries of the car’s lines and reflections as your path’s boundaries. When needed, utilize shift+clicks and alt+clicks to add/subtract selections from each other.
There really is no such thing as overkill when it comes to paths. The more, the merrier.
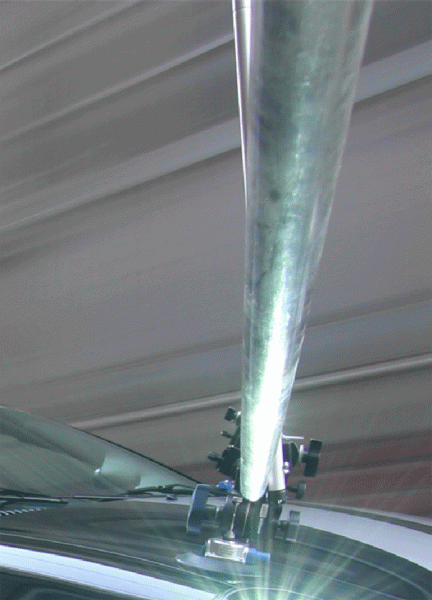
#2 Make quick work of backgrounds with the clone tool. — Let’s face it; without the clone tool, many of us would be helpless to remove even the smallest of discrepancies in our images. It is by far the most powerful tool for removing rigs, but to utilize it to its full potential, one must regularly alter brush size, brush hardness, and opacity.
Various textures and elements in backgrounds of rig shots blur and merge into strange shapes and gradients. Rig shots have that certain “Wow! factor,” because of this illusion of motion represented through the converging lines.
Converging lines are very difficult to replicate when cloning because there is no correct source to clone from. On one side of the rig, the line may be too thick and on the other, too thin.
To solve this, use a smaller brush with a medium opacity, and over several strokes blend the two sides together. It will take a little patience, but it is well worth the effort.
#3 Eliminate repetition of pattern with the healing brush. — There are some instances where the clone tool just won’t cut it. Often, the source area (the area you are cloning from) may be smaller than the area you are cloning to. In this case, the clone tool may cause a repetition of pattern that may be visible to viewers.
I always find it funny when I look at an image and see the same tree branch 5 times in the background. The healing brush can be used to disrupt any accidental patterns caused by cloning. Use it just as you would the clone tool.
#4 The paint brush is the Ace in the “Hole.” — You may come across certain situations in which the clone tool and the healing brush are both insufficient. The paint brush, with a little practice, can be the most effective tool in removing rigs from images. The key is to vary brush size, brush hardness, and opacity and to use other parts of the image as reference to what you are painting. I’ve touched on this briefly in the past. Refer to Removing Reflections in Post for more detailed instruction.
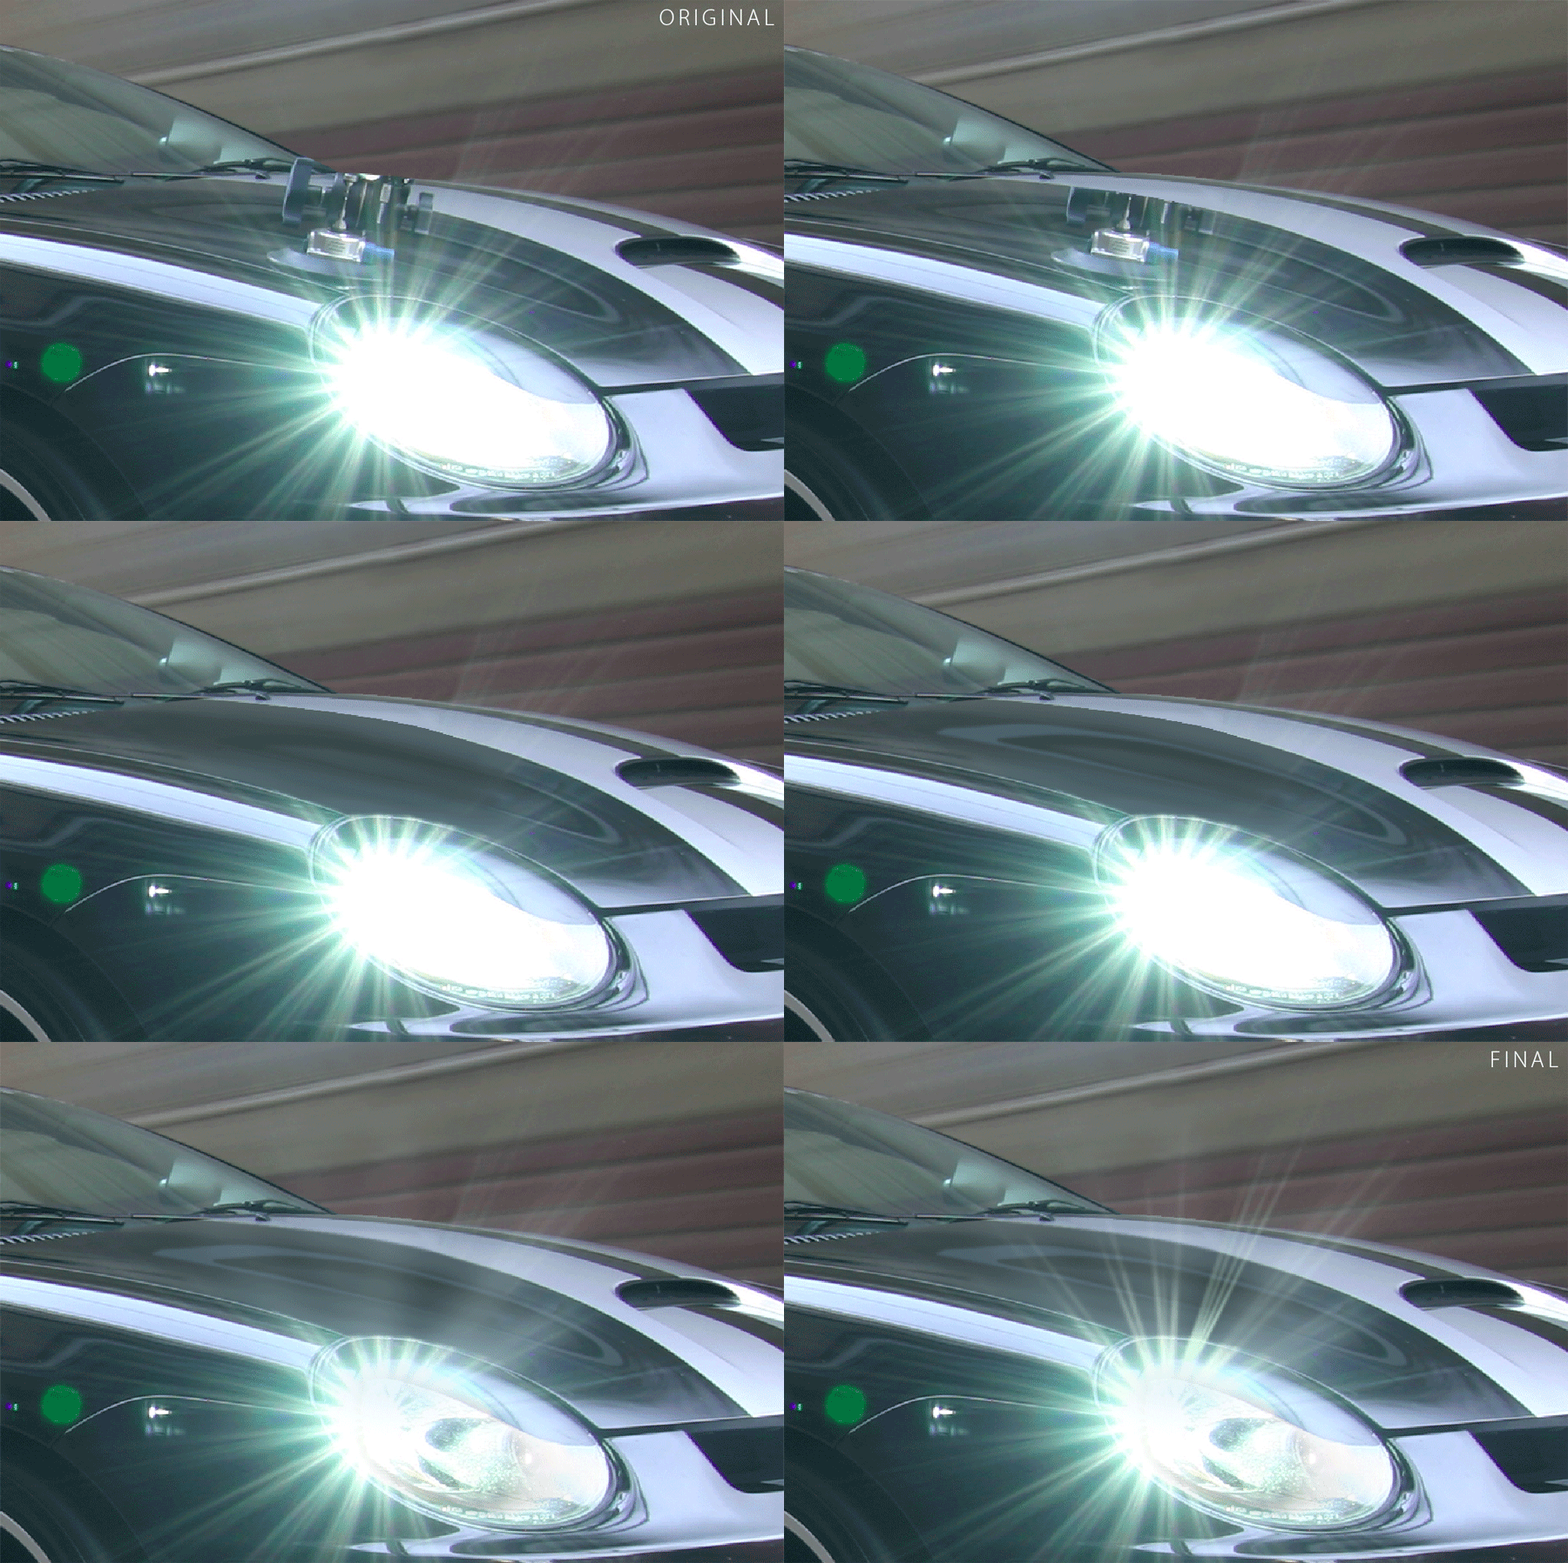
Believe it or not, this whole hood was recreated with the paint brush. There wasn’t enough source area to clone from, so I was forced to create from scratch the various elements of the hood.
#5 Reduce harsh edges with the blur tool. — Paths, in combination with any of the above tools, have the tendency to create very hard edges. These edges may stick out like a sore thumb as rig shots typically have some camera shake. In many instances, the blur may increase as the relative distance of the object to the lens increases (ex. the rear wheel being more blurry than the front wheel on a front 3/4 rig shot). It is important to take this effect into consideration and use the blur tool accordingly.
Using these 5 tips (and a few more :p) I was able to successfully remove the rig from this SRT-4 image. Check out the animation below to see the whole process.
