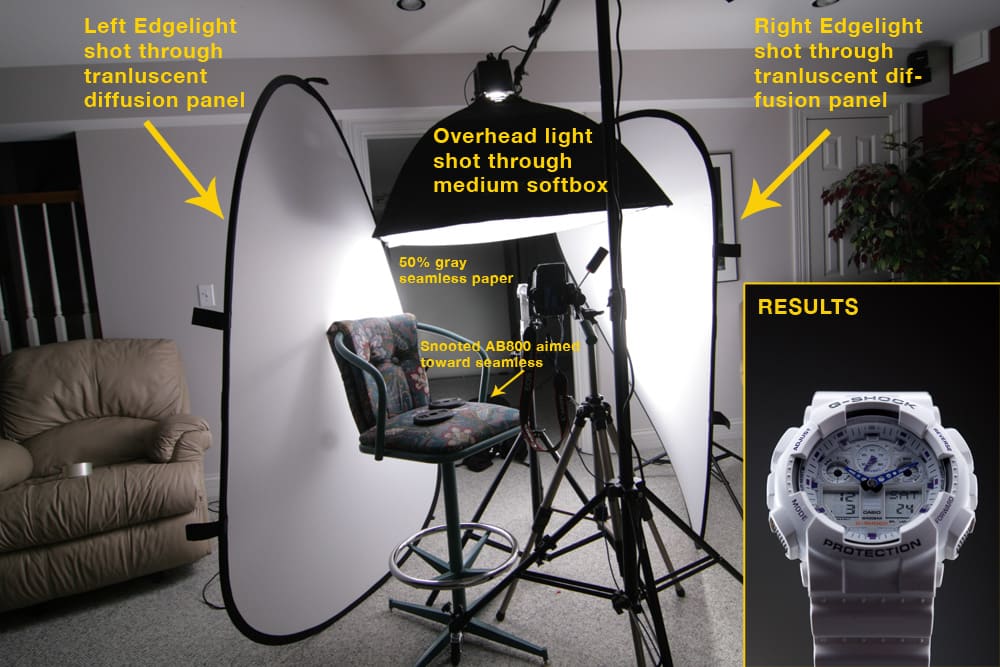
I used a basic 4 light setup made up of 4 AB800′s. In truth, I actually needed 5 lights to do this shot in one take, which wasn’t an option, and I so I was forced to merge multiple exposures. The overwhelming majority of the final image was made from this light setup. As you can see, I have two edge/rimlights that are being shot through transluscent diffusion panels. Softboxes would have also worked for the edgelights. I then had another AB-400 that was shot through a medium-sized softbox that was meant to expose the top of the watch and the face of the watch. Lastly, I had a AB800 on the ground that was snooted and aimed toward my 50% gray seamless paper. You can see my light setup and the results of this setup in the pic below

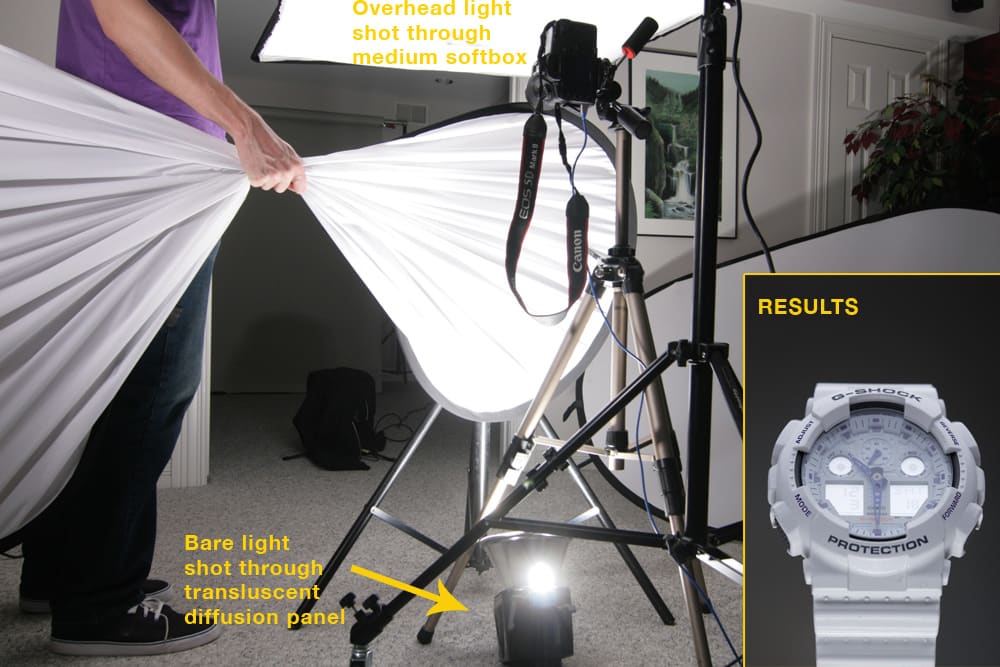
Looking at the results, there are several things I don’t like. The bottom of the strap and the face seem too dark. To brighten up the lower strap, I needed to place a light shooting up. I removed both of the edge lights from the image, and placed one of the AB800′s on the ground, pointed up. Because the camera, camera tripod, and lightstand the product was attached too were so close together, I didn’t have room to put a softbox on the light. Instead, I decided to simply hold one of the diffusion panels, and force it in between the light and the product. You can see this light setup and the results in the pic below.

These too lighting setups (w/ slight variations) were really all that was needed to expose the watch.
Once the idea of lightning came to me, I realized I needed a background with a little more color. I turned off all my lights and busted out some blacklight tubes that I bought at home depot. I wanted a background that looked abstract, but had hints of a subtle glow. To do this, I took a long exposure and waved the blacklights around in a random fashion. Here is that result.
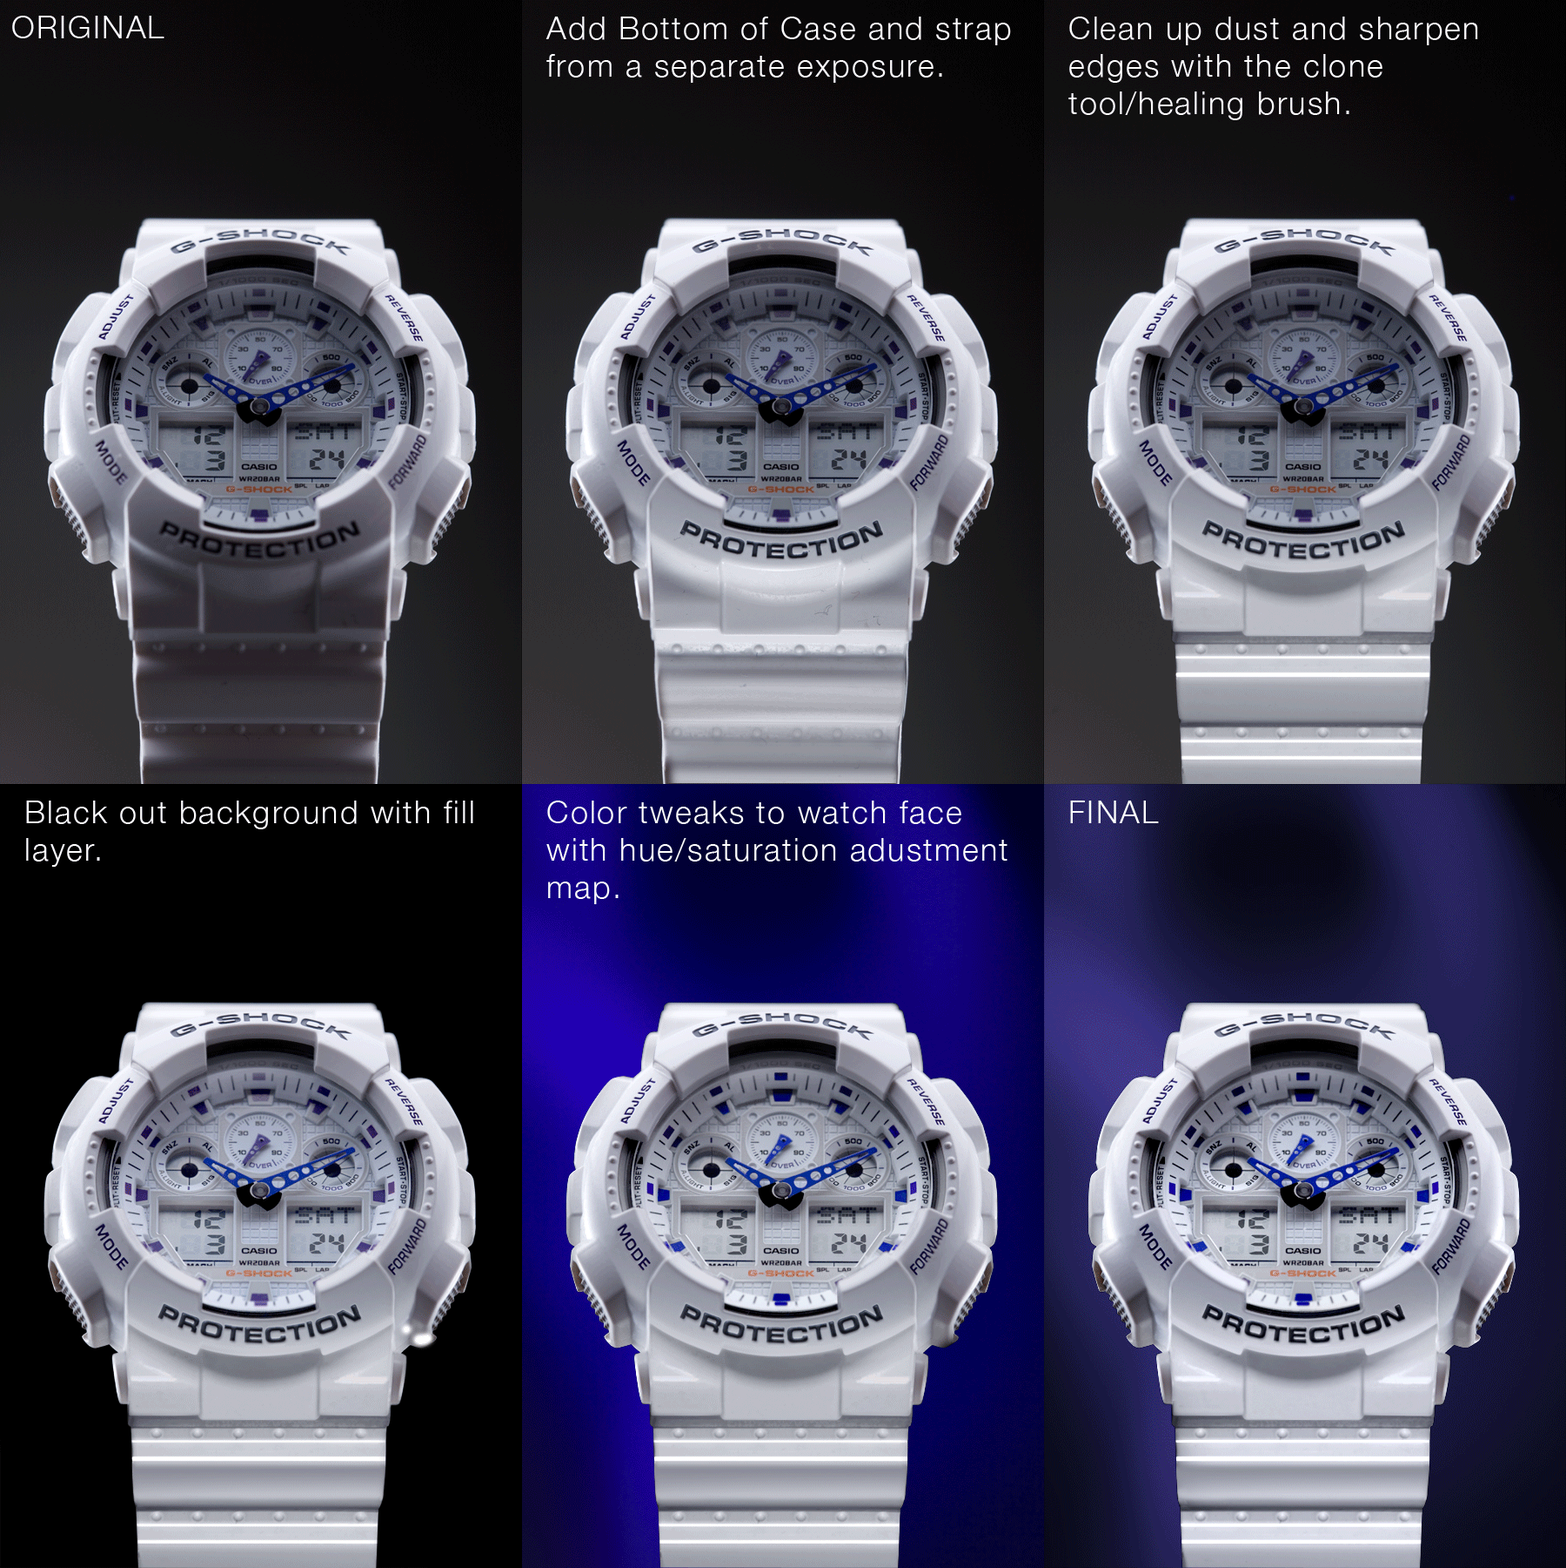
So with all the basics covered, it was now time to combine everything in post. This animation covers the entire process from beginning to end.

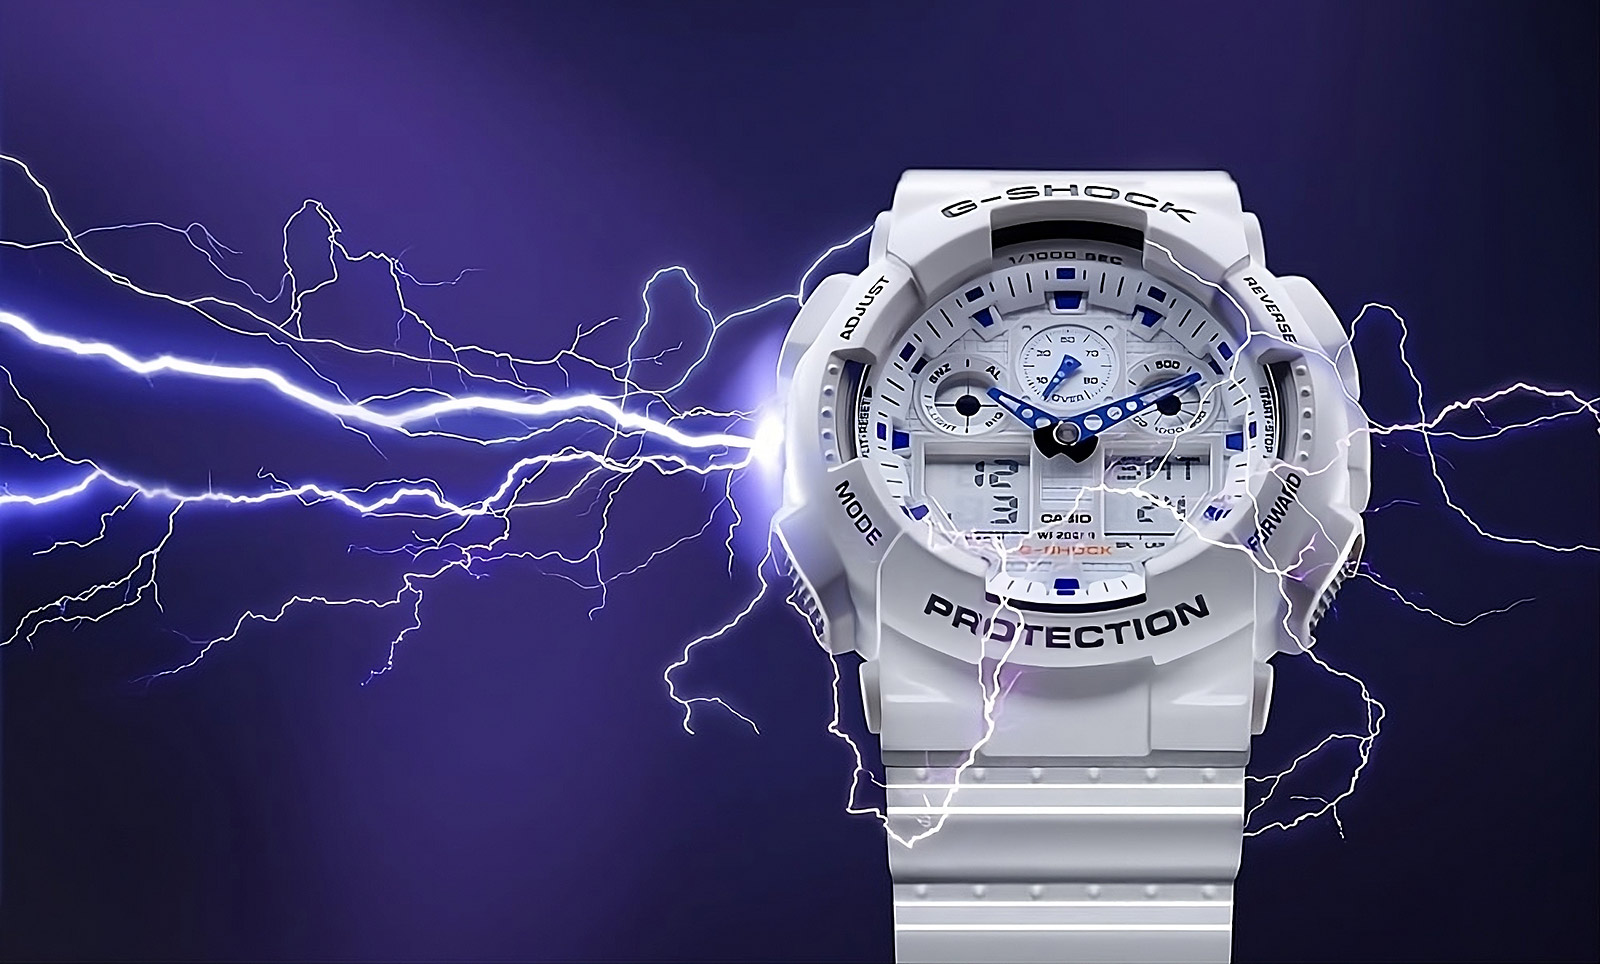
And now a look at the final image…
